Hey! Tea lovers! Before talking about Lombok, what are the things that irritate us Java Developers the most? Well yes, hearing “Java is dying” from a Python developer is irritating but it is the second thing. The first one is the boilerplate code. We write it almost every time. Setters and getters, constructors, toString, and many others for simple POJO classes. Of course, IDE can generate this code for you but again, your simple POJO class then becomes redundant. And the only things that matter in the POJO are the fields, so why not write fields only and let the compiler handles the rest of the things? And that’s where Project Lombok comes into the picture.
Let us see how Lombok makes your code less cluttered and readable. So, prepare your cup of tea to sip and code with CodersTea
What is Project Lombok
The official page says this:
Project Lombok is a java library that automatically plugs into your editor and builds tools, spicing up your java.
Never write another getter or equals method again, with one annotation your class has a fully-featured builder, Automate your logging variables, and much more.
In short, it generates code for most of the common things, that too in compile time. It generates not only setters or getters but also constructors, log variables, builders, util class, etc.
Install Lombok
As it’s a library, you need to download it from Project Lombok. The version as of now is 1.18.12. This library can be used in various ways such as JDK compiler or javac, IDEs such as IntelliJ, Eclipse, and NetBeans, build tools like Maven, Gradle, etc, and you can also use it in Android.
For this post, I will show you IDE integration with both IntelliJ and Eclipse. Once we set up the library, we will move on the how to use it with our code.
Ecplise
Once you download the Lombok jar, run the jar. you can double-click and run it or run it via command with
java -jar lombok.jar
It will open up a window to install it. But make sure Eclipse is closed otherwise it may not take effect. You will see the following window and a list of eclipses on your system. Select the one you want to integrate with and click on the Install/Update button.
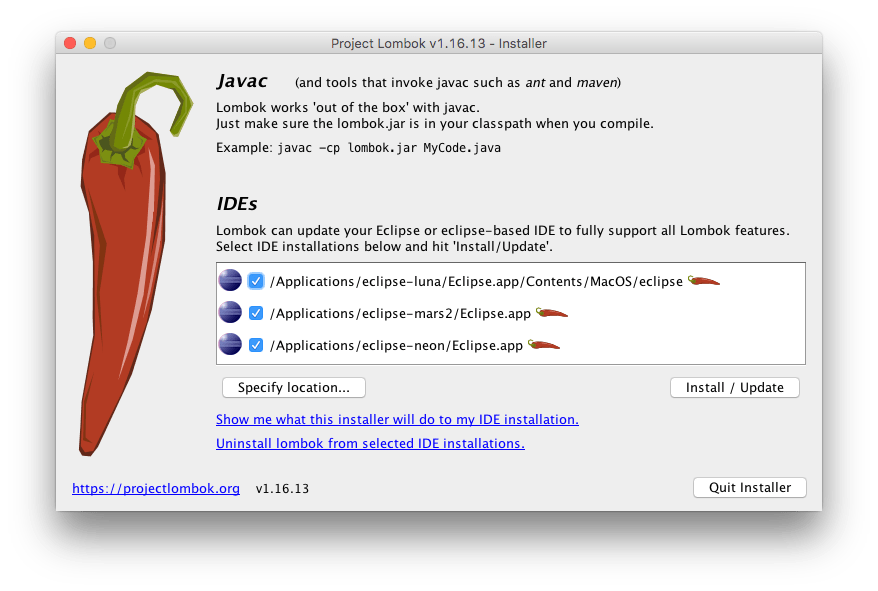
If you are not seeing the list, then click on the Specify Location and go to your Eclipse IDE path. In my case its “D:\Runnable\eclipse-ide\2020-03\eclipse”. click eclipse.exe and ok.
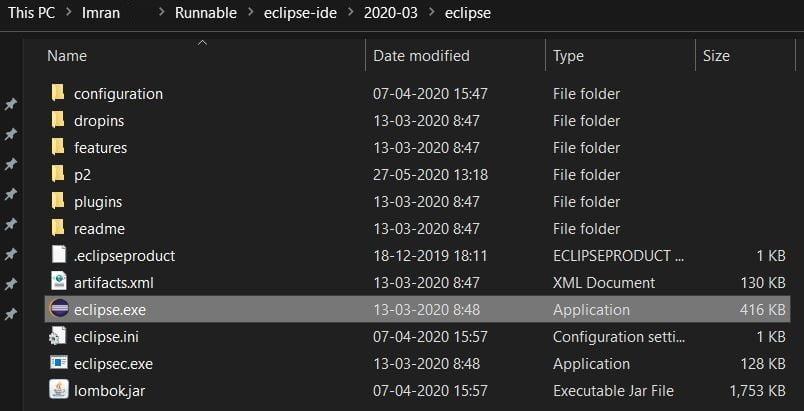
Then, click the quit installer. Now, you will see the lomok.jar in the eclipse folder as well. You can verify by going to Help > About Eclipse IDE. You will see the following in the last line.
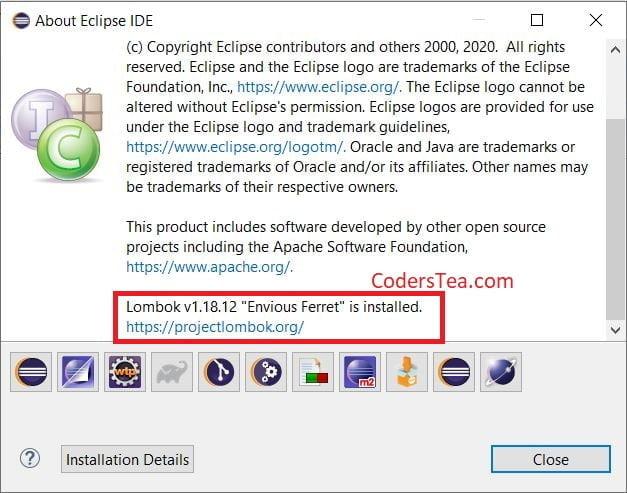
Verify installation
IntelliJ IDEA
Well, it’s very simple. You just have to install the Lombok plugin from the marketplace.
- File> Settings or click
Ctrl + Alt + S. - Plugins > Marketplace tab
- Search for Lombok
- Install the plugin by Michail Plushnikov
- Restart the IDE
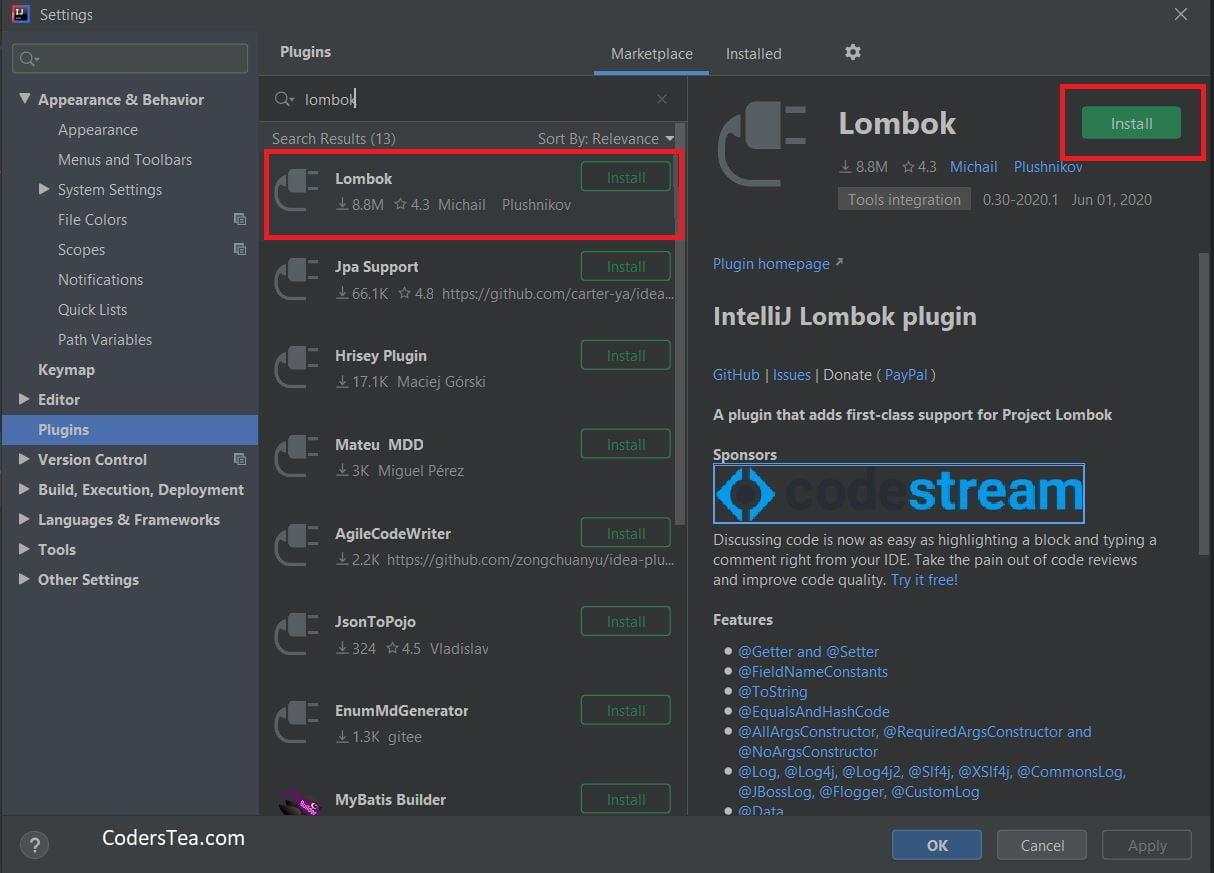
Lombok Installation in IntelliJ IDEA
Since it works on compile-time and needs annotations, you might want to on the annotation processor. In the latest version, it shows a popup to start it after you install Lombok. If not, try doing the following.
- File> Settings or click
Ctrl + Alt + S. - Build, Execution, Deployment > Annotation Processors
- Check Enable annotation processing and then click apply.
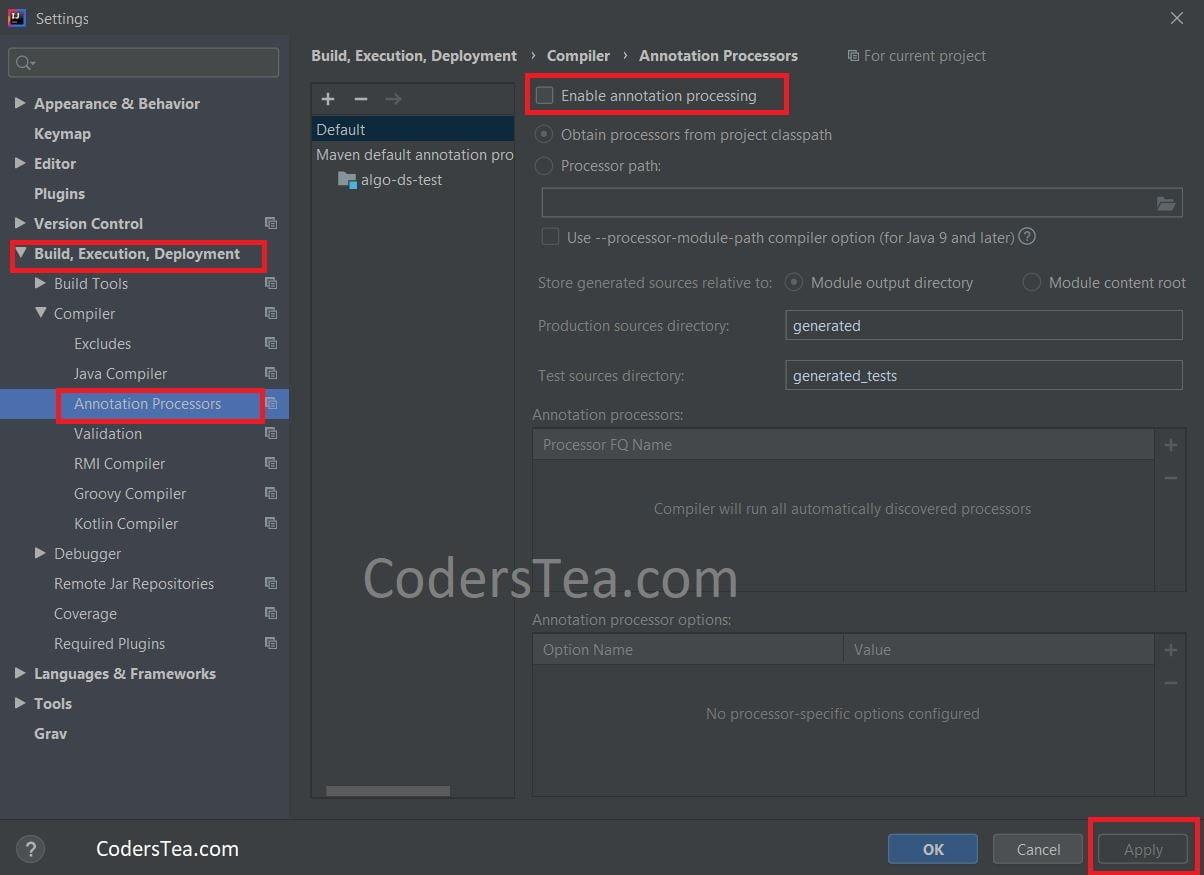
IntelliJ IDEA annotation processing
Add Lombok Dependency
Now that we installed it in our IDE we need to use it in our code. But to do that you have to add the dependency of the Lombok library into the code. You can do it manually or via maven. Here is the Maven dependency:
<dependency>
    <groupId>org.projectlombok</groupId>
    <artifactId>lombok</artifactId>
    <!-- use the latest stable version.-->
    <version>1.18.12</version>
    <scope>provided</scope>
</dependency>
For Gradle users, you can do so by adding the following,
repositories {
	mavenCentral()
}
dependencies {
	compileOnly 'org.projectlombok:lombok:1.18.12'
	annotationProcessor 'org.projectlombok:lombok:1.18.12'
	testCompileOnly 'org.projectlombok:lombok:1.18.12'
	testAnnotationProcessor 'org.projectlombok:lombok:1.18.12'
}
To be Continued…
The installation and usage explanation made the post a bit long. So I decided to divide the post into two parts. This part was about what is Lombok and how to install it. In the second part, we will see how to incorporate Lombok into our code. Please continue your reading with " Say Good-Bye to Boilerplate Code with Lombok: Part 2-The Code".
You can see more posts like this on CodersTea. Or search by categories such as Java, Sp ring, and Best Practices.
See you in the next post. HAKUNA MATATA!!!