
Hey! Tea lovers. Let us talk about the first baby step we take into the Java world. And that’s the installation of Java Development Kit aka JDK. There are only 3 steps to set up JDK, without the installer. You can have multiple versions of JDK at the same time and switch between them very easily. Prepare your tea and let us see those 3 magical steps.
TL;DR
This post discusses the installation of JDK on the Windows system. We will be discussing other operating systems such as Ubuntu and Centos. The JDK I am utilizing for the aforementioned post is OpenJDK 13. We have JDK 14 as well but it’s an early release and might have bugs. So we won’t be using that.
You can apply this tutorial to any version of JDK.
Step 1: Downloading the Latest JDK
You can download OpenJDK 13 from here. You can select any version you like. We will be selecting 13 windows zip.
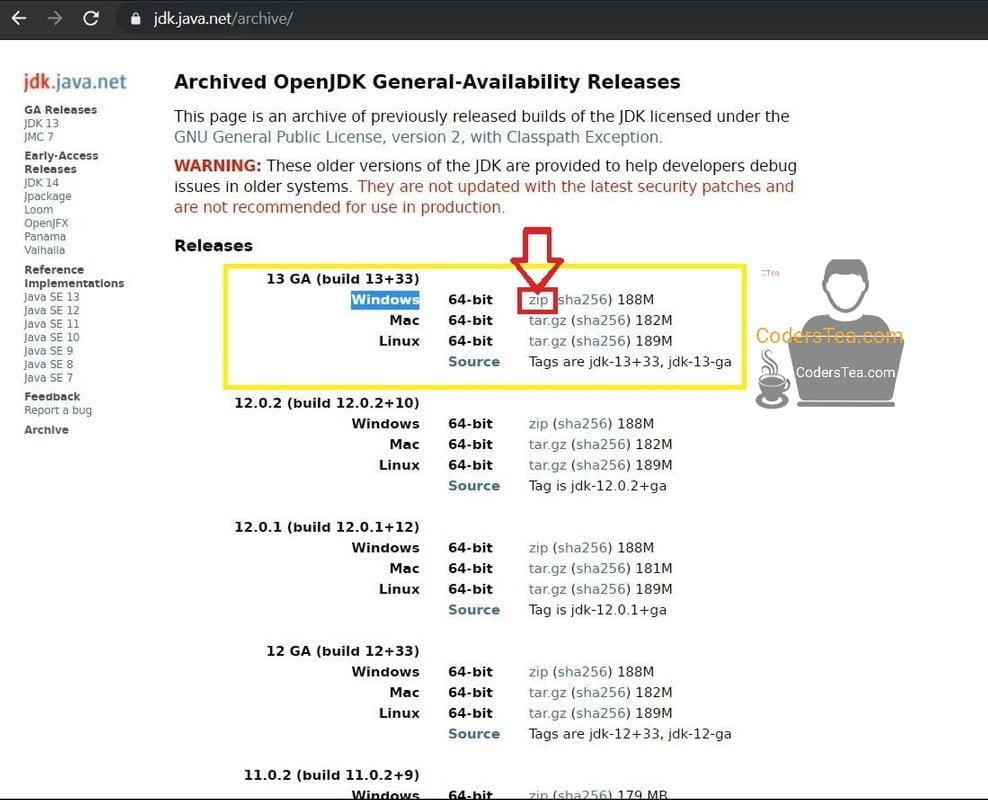
Download Latest Java Version set
Step 2: Installing Latest JDK
Extract the contents of the zip C:/Program Files/Java/ or in any other folder of your choice. It is common to find Java in this folder so it less time in finding it.
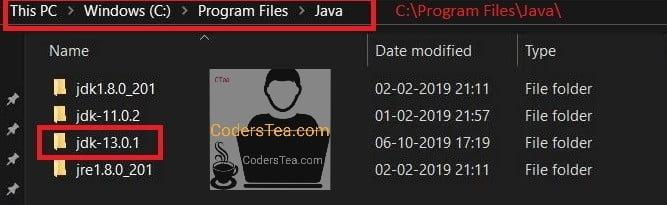
Installing Latest JDK set
Step 3: Setting Up Path Variables
Putting the JDK folder inside Java won’t make it run the latest version. We have to tell Windows to point to this folder jdk-13.0.1 whenever we call java or javac. And this step is what lets you switch between the JDK of your choice. So the journey is,
1. Go to Control Panel > System and Security > System > Advanced System settings
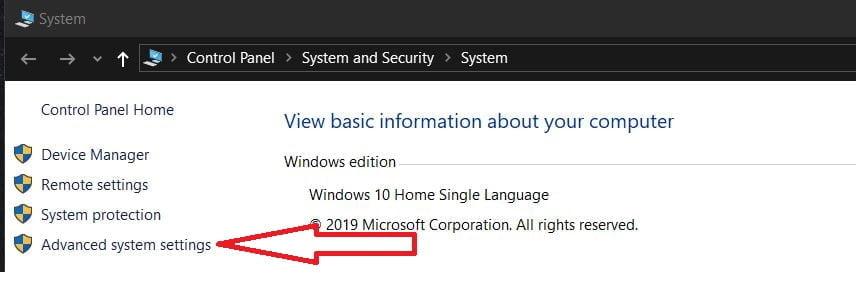
Windows Advanced system setting set
2. Click on Environment Variables.
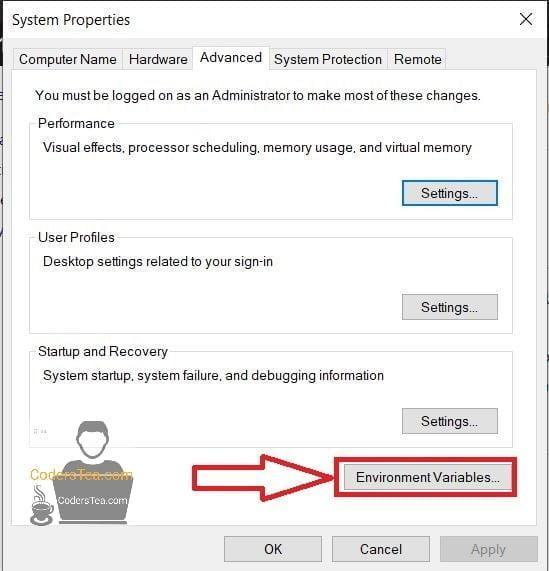
Windows environment variables setter
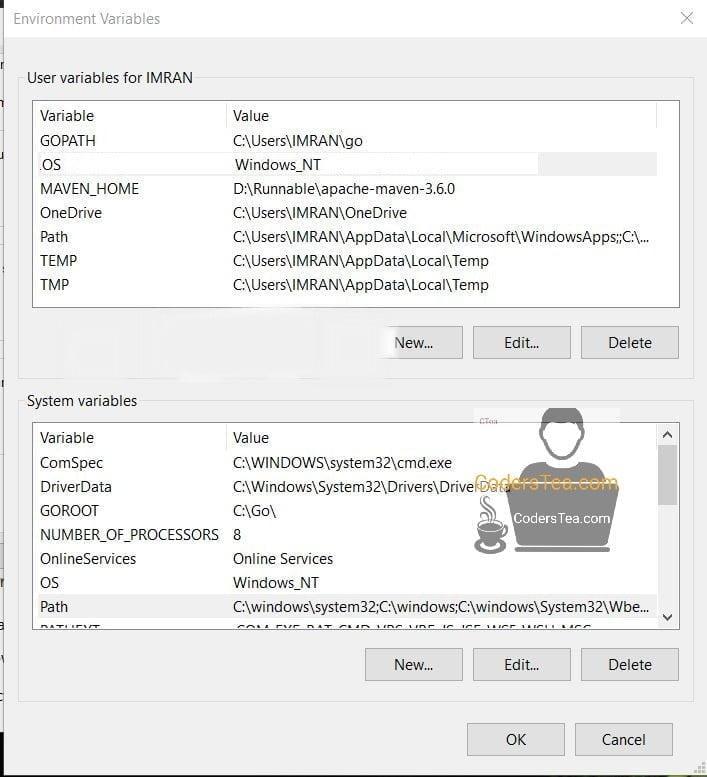
You will be getting 2 sections User variables and System variables.
Env Variables setting be
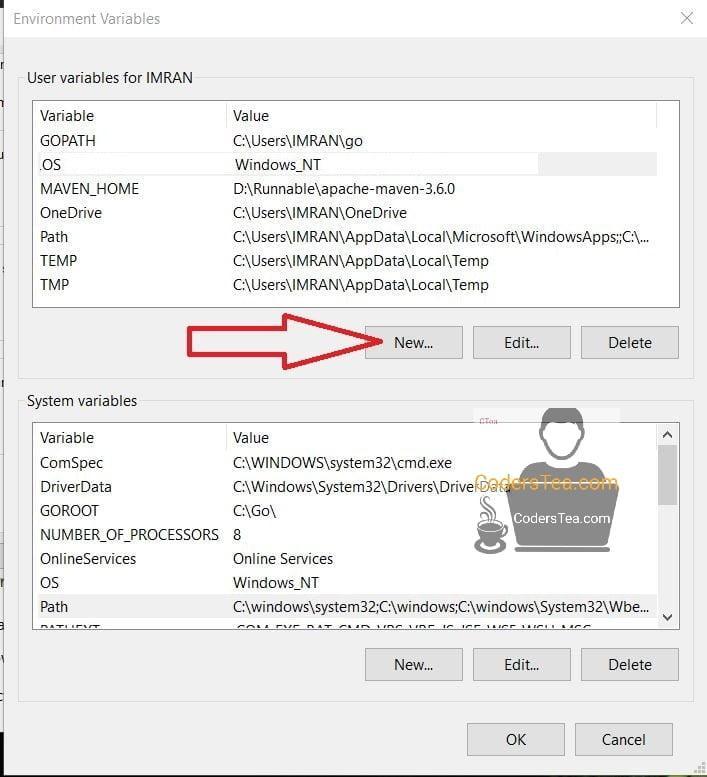
3. For Java Home, Click the New button under User variables for
windows new env variable in
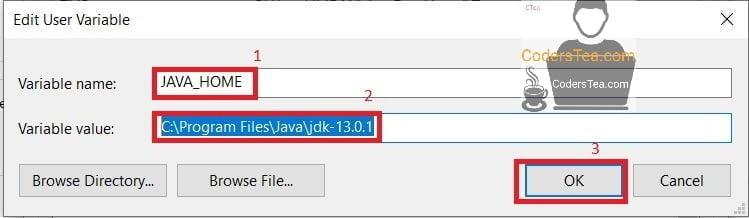
4. In the Variable name type JAVA_HOME and Variable value paste the path to the JDK folder, In this case, C:\Program Files\Java\jdk-13.1.0. Then press OK.
put name and value
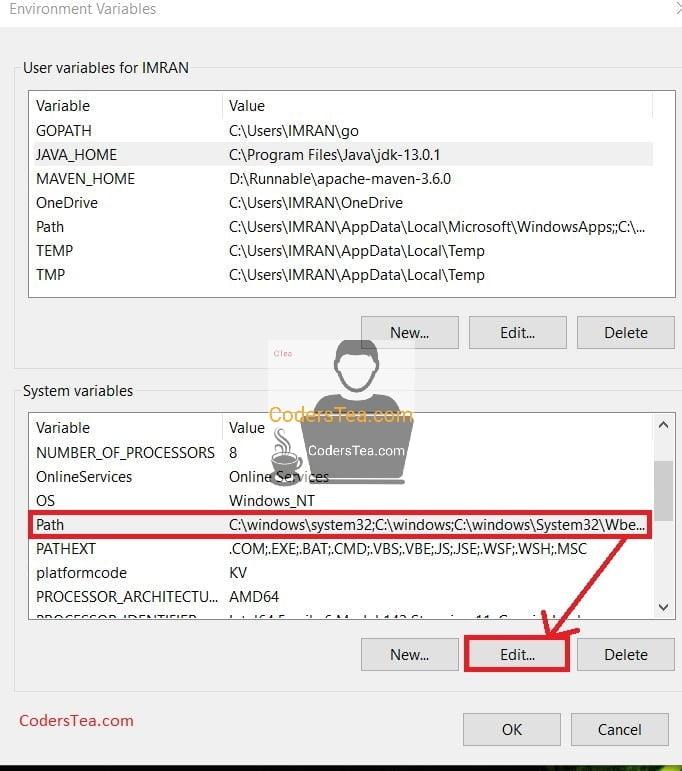
5. Now click the Path variable from the System variables section. Either double-click it or click edit.
If you don’t have Admin access you can edit the Path of your current account, which is under User variables for
section.
Add JDK path in widnows
6. Click the New button and paste the path of the bin folder of the JDK (<path of JAVA_HOME>).
For me, it will be C:\Program Files\Java\jdk-13.1.0\bin . Then click OK.
In case of already existing JDK such as JDK8 by Oracle or any other, remove that or replace with this path.

New path in windows set
7. Now click OK on all the popup windows to save the changes. And open the command line for the next step.
Verification
Open the new cmd console. Do not verify on already opened cmd. These changes won’t reflect in it. Type the following commands to verify the changes.
java -version: Returns the version of JDK. It should return 13.1.0.javac -version: Returns the version of the JDK compiler. It again should return 13.1.0.- echo %JAVA_HOME%: Should return to the JDK path. For me, it will be
C:\Program Files\Java\jdk-13.1.0\.
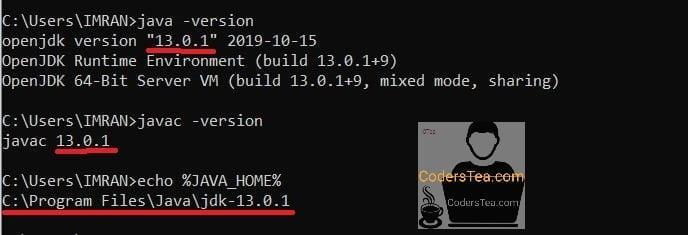
Verify JDK instalaltion
Conclusion
And that’s how you install the latest JDK on windows. We have covered the Windows installation of the latest JDK, 13.1.0. As I said, the procedure is the same for any other version as long as you set the path variables. We will be having the latest JDK installation guide for the Linux systems such as Ubuntu and Centos. So make your tea ready by then to sip and learn. Please share your thoughts on this in the comment section. You can check out the Java Best Practices.
See you in the next post. HAKUNA MATATA!!!