Social Media is what drives this world now. The first thing we do when we get a new smartphone is, install social media apps such as Facebook, Instagram, Whatsapp, etc. They all are different in their way, but what is common between these apps is the chat function. They provide users with a real-time chat with the other person or chatbot. The message gets instantly delivered to another person and receives a reply at that speed too. But the question is, how do they communicate in real-time? What is it that they using? And most importantly, how to make one by yourself?
How do they make a Chat App?
They use a protocol. This protocol can be WebSocket or XMPP or MQTT. These protocols are different from normal HTTP. Each one of these works differently than the others, but the result is the same, we get instant messages. Of course, they all have their advantages and disadvantages, which are beyond the scope of this article. Please let me know in the comments if you want to know more about these protocols. I will talk about Websocket in this post with the help of Spring WebSocket. Prepare your tea to sip and read this post. Let’s get started. You can download the whole Chat App from GitHub, GitLab, and BitBucket.
What Is The WebSocket
The definition from the MDN is
“The WebSocket API is an advanced technology that makes it possible to open a two-way interactive communication session between the user’s browser and a server. With this API, you can send messages to a server and receive event-driven responses without having to poll the server for a reply.”
In short, your connection with the server is a full-duplex or two-way with two different connections. One for incoming and the other for outgoing, unlike HTTP where you need to wait for the response after a request. We will use Spring WebSocket for our little chat application.
Spring WebSocket lets you make a server with the WebSocket in Java. It abstracts all the complexity and gives you a less complex code design. It uses the STOMP, Sock.js in the front end (browser) and Spring WebSocket on the server. We will be creating a simple chat app using these things, a group chat in precise. Let us call it, Chat Application With Spring WebSocket.
Create A Spring Boot Project
First, we need to create a project with all the dependencies. Let’s see what is the requirements for this app.
- Java 8 or above. Install the Latest or Any Java Version in 3 Simple Steps on Windows.
- IDE
- Maven
Make sure you tick all of the above. Then we will create a project with Spring Initializr. Put input as shown in the below image. Make sure to add the dependency for WebSocket.
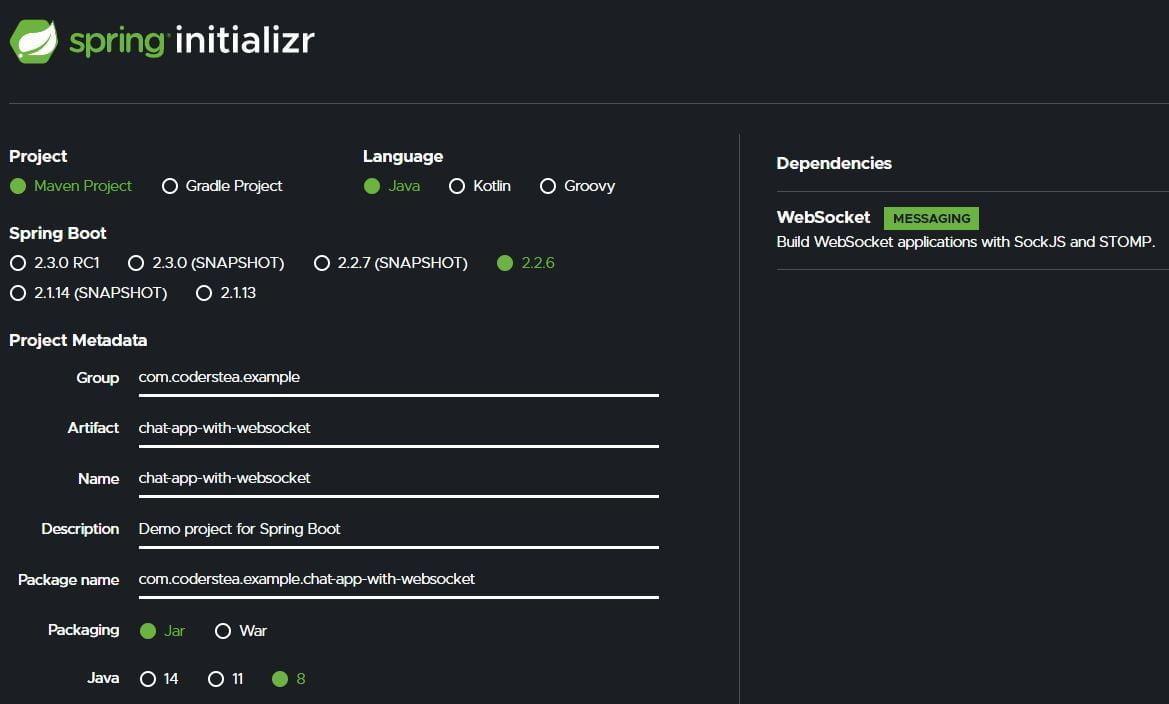
Spring Initializer
Download it and open it in your favorite IDE. I will use IntelliJ IDEA. I chose this for greater productivity. You can also skyrocket your productivity in this IDE with the help of these tricks.
Now that your project is ready, let us jump to the code.
Configuration for Spring Websocket
The first thing you want to do is to configure the WebSocket. Here, we configure the endpoints and some other pieces of stuff for the WebSocket.
package com.coderstea.example.chatappwithwebsocket.config;
import org.springframework.context.annotation.Configuration;
import org.springframework.messaging.simp.config.MessageBrokerRegistry;
import org.springframework.web.socket.config.annotation.EnableWebSocketMessageBroker;
import org.springframework.web.socket.config.annotation.StompEndpointRegistry;
import org.springframework.web.socket.config.annotation.WebSocketMessageBrokerConfigurer;
@Configuration
@EnableWebSocketMessageBroker
public class WebSocketConfig implements WebSocketMessageBrokerConfigurer {
    @Override
    public void configureMessageBroker(MessageBrokerRegistry config) {
        // this adds 'topic' as prefix to all the destinations (receiving endpoints)
        config.enableSimpleBroker("/topic");
        //prefix of MessageMapping or the sending endpoint.
        config.setApplicationDestinationPrefixes("/app");
    }
    @Override
    public void registerStompEndpoints(StompEndpointRegistry registry) {
        //This will be use to connect Sock.js
        registry.addEndpoint("/CodersTea-ws").withSockJS();
    }
}
You can see two overridden methods. In the configureMessageBroker, you set the endpoint prefixes. These endpoint prefixes will be added to your WebSocket endpoints. Endpoints are the URLs. We have two endpoints in general, one is the sender or publisher, and the receiver or subscriber. In the registerStompEndpoints, we put the endpoint for Sock.js to connect. You can also configure the message size, buffer size, and can even handle every connection event as well such as connected and disconnected.
The Chat Controller
Making endpoints on the server is very easy. you only need two things, @MessageMapping() and @SendTo().
@MessageMapping("send-msg-to") the endpoint is where the Sock.js sends the message. And @SendTo("/topic/receive-msg-at") forwards the return value to all the subscribers of /topic/receive-msg-at. I am using the same DTO to send and receive however, you can use different DTOs for your application.
package com.coderstea.example.chatappwithwebsocket.controller;
import com.coderstea.example.chatappwithwebsocket.dto.ChatDto;
import org.springframework.messaging.handler.annotation.MessageMapping;
import org.springframework.messaging.handler.annotation.SendTo;
import org.springframework.stereotype.Controller;
@Controller
public class ChatController {
    //send to this with /app/send-msg-at
    /// you don't need to put /app
    @MessageMapping("send-msg-at")
    //all the subscriber to this  will get the message
    @SendTo("/topic/receive-msg-at")
    public ChatDto chatWithUsers(ChatDto chatDto){
        //do some other stuffs if you want to or modify the chatDto
        return chatDto;
    }
}
And for holding the message we will use ChatDto.
package com.coderstea.example.chatappwithwebsocket.dto;
public class ChatDto {
    private String sentAt;
    private String sentBy;
    private String msg;
    //getters and setters and constructor
 }
With this, your server-side code is done. Now, we have to look into client-side code.
The Chat Client
You will be needing Sock.js and Stomp.js scripts to be able to connect to WebSocket. We will be using CDN for that matter.
<script src="https://cdnjs.cloudflare.com/ajax/libs/sockjs-client/1.4.0/sockjs.min.js"></script>
<script src="https://cdnjs.cloudflare.com/ajax/libs/stomp.js/2.3.3/stomp.min.js"></script>
Create a index.html file in the src\main\resources\static\index.html. The following is just plain HTML. We will be using bootstrap.js it for our styling.
<!doctype html>
<html lang="en">
<head>
    <meta charset="UTF-8">
    <meta name="viewport"
        content="width=device-width, user-scalable=no, initial-scale=1.0, maximum-scale=1.0, minimum-scale=1.0">
    <meta http-equiv="X-UA-Compatible" content="ie=edge">
    <title>Chat App | coderstea.in</title>
</head>
<body>
    <div class="container">
        <h2 class="bg-dark text-white p-2 text-center">
            Hello, <span id="user-name">User</span>!
        </h2>
        <h4 class="bg-success text-white text-center p-1">Welcome to coderstea.in Chat App.</h4>
        <div class="row d-flex justify-content-center">
            <div class="col-lg-6 col-sm-10 border border-primary shadow-lg" id="msg-window"
                style="height:400px; overflow:scroll;">
                <!-- msg will popup here by js -->
            </div>
            <div class="col-lg-7 col-sm-12 px-4 m-3">
                <form class="row">
                    <div class="form-group col-8">
                        <input class="form-control" id="msg-text" placeholder="Your Message">
                    </div>
                    <div class="col-4">
                        <input type="submit" class="btn btn-primary col" id="msg-send" value="send">
                    </div>
                </form>
            </div>
            <!-- Default form login -->
        </div>
    </div>
</body>
<!--bootstrap cdn-->
<link rel="stylesheet" href="https://stackpath.bootstrapcdn.com/bootstrap/4.4.1/css/bootstrap.min.css">
<script src="https://code.jquery.com/jquery-3.4.1.slim.min.js"></script>
<script src="https://cdn.jsdelivr.net/npm/popper.js@1.16.0/dist/umd/popper.min.js"></script>
<script src="https://stackpath.bootstrapcdn.com/bootstrap/4.4.1/js/bootstrap.min.js"></script>
<!--sockjs-->
<script src="https://cdnjs.cloudflare.com/ajax/libs/sockjs-client/1.4.0/sockjs.min.js"></script>
<script src="https://cdnjs.cloudflare.com/ajax/libs/stomp.js/2.3.3/stomp.min.js"></script>
<!--custom-js-->
<script src="chat-app.js"></script>
</html>
We will write our main code in the chat-app.js file on the same path as src\main\resources\static\chat-app.js. I will explain it bit by bit. The first thing we want to do is take the user’s name. For that, we will use prompt and will generate a random name as well in case users want to skip the part.
//take user name in the sart
user = prompt("Hey, whats your name?", `user-${new Date().getTime()}`);
//to show on header
document.getElementById('user-name').innerHTML = user;
Next, we will connect to the socket. Creating SockJS and passing the endpoint and creating an Stomp over this object with Stomp.over(socket). After this, we will connect the stomp client with its connect function.
var socket = new SockJS('/CodersTea-ws');
 stompClient = Stomp.over(socket);
 stompClient.connect({}, function (frame) {
   //do some stuff
});
Now that the connection is made, we can subscribe to a specific endpoint and can send the messages to a specific endpoint. Let us see the subscription. In the connect function, we will replace the do some stuff comment with the subscription code.
//to recieve messages form other users
stompClient.subscribe('/topic/receive-msg-at', function (receivedMessage) {
    //we only need body and parse it in json
    const message= JSON.parse(receivedMessage.body);
});
As you can see, /topic/receive-msg-at is an endpoint we are subscribed to. And whenever a message gets published to this endpoint, we will receive it. The receivedMessaged is an object we get from the publisher. it has many properties but the main content is in the body. In this example, we are using it ChatDto, so we will parse it to JSON. If you have only a single string then you don’t need to parse it.
Sending is done by the send function, which takes an endpoint to send to and a message and one another parameter. In our case, the endpoint is /app/send-msg-to. Internally we forward the content of this endpoint to /topic/receive-msg-at/ subscribers. Make sure to parse the JSON object into a string.
//endpoint and json object in string
stompClient.send('/app/send-msg-to', {}, JSON.stringify({
    sentAt: getCurrentTime(),
    sentBy: user,
    msg: msg
}));
Now that you have understood the main content, here is the full js file. It contains all the logic including, populating UI elements.
var user, stompClient;
window.onload = () => {
    //take user name in the sart
    user = prompt("Hey, whats your name?", `user-${new Date().getTime()}`);
    //to show on header
    document.getElementById('user-name').innerHTML = user;
    //connect to websocket and some other stuffs
    startMessaging(user);
}
function startMessaging(user) {
    var socket = new SockJS('/CodersTea-ws');
    stompClient = Stomp.over(socket);
    stompClient.connect({}, function (frame) {
        //to recieve messages form other users
        stompClient.subscribe('/topic/receive-msg-at', function (chat) {
            //we only need body and parse it in json
            chat = JSON.parse(chat.body);
            //we want to skip our own chat
            //since we are also subscribing to the same endpoint as others
            if (chat.sentBy === user) {return;}
            //show msg on window ui
            showRecievedMessageOnMsgWindow(chat);
        });
    });
}
function showRecievedMessageOnMsgWindow(chat) {
    const recievedMsgHtml =
        `<div class="row">
        <div class="card message-card rounded m-1 mr-5">
            <div class="card-body bg-danger rounded text-white p-2">
                <div class="p-1">
                    <small class="float-left">
                    ${chat.sentBy}
                    </small>
                    <small class="float-right ml-1">
                        ${chat.sentAt}
                    </small>
                </div>
                <hr class="text-white bg-white ">
                <p class="card-text">
                    ${chat.msg}
                </p>
            </div>
        </div>
    </div>`;
    showMsgOnWindow(recievedMsgHtml);
}
//send messages to other users
document.getElementById('msg-send').onclick = (e) => {
    //prevent default form submit
    e.preventDefault();
    const msgInput = document.getElementById('msg-text');
    const msg = msgInput.value;
    msgInput.value = '';
    //send msg over stomp
    sendMessageToUsers(user, msg);
    //show self msg on righ side
    showSelfMsgOnUi(user, msg);
}
function sendMessageToUsers(user, msg) {
    //endpoint and json object in string
    stompClient.send('/app/send-msg-to', {}, JSON.stringify({
        sentAt: getCurrentTime(),
        sentBy: user,
        msg: msg
    }));
}
//put the msg on right side with blue color
function showSelfMsgOnUi(user, msg) {
    const selfMsgHtml = `<div class="row justify-content-end">
        <div class="card message-card rounded m-1 ml-5">
            <div class="card-body bg-primary rounded text-white p-2">
                <div class="p-1">
                    <small class="float-left">
                        ${user}
                    </small>
                    <small class="float-right ml-1">
                        ${getCurrentTime()}
                    </small>
                </div>
                <hr class="text-white bg-white ">
                <p class="card-text">
                    ${msg}
                </p>
            </div>
        </div>
    </div>`;
    showMsgOnWindow(selfMsgHtml);
}
//to put given html in scollable window
function showMsgOnWindow(msgHtml) {
    const msgWindow = document.getElementById('msg-window');
    const msgBox = document.createElement('div');
    msgBox.innerHTML = msgHtml;
    //add html at the end
    msgWindow.append(msgBox);
    //scroll to the latest msg
    msgWindow.scrollTop = msgWindow.scrollHeight;
}
//time as 12:00
function getCurrentTime() {
    const now = new Date();
    return now.getHours() + ':' + now.getMinutes();
}
The Real Test
Now that we have understood and written the code as well, it’s time for the testing. You can find the code on GitHub, GitLab, and BitBucket. God, I am so nervous. Let’s run it and go to localhost:8081. You will be prompted to input your name. And then, you can start sending msgs.
Enter your name.
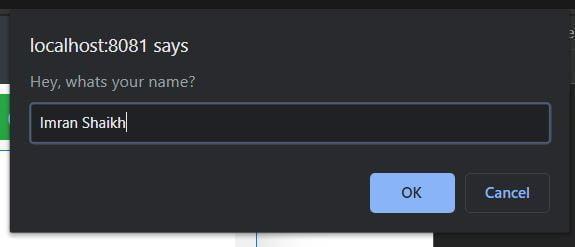
name input for chat
And this is what chat looks like.
User1’s window.
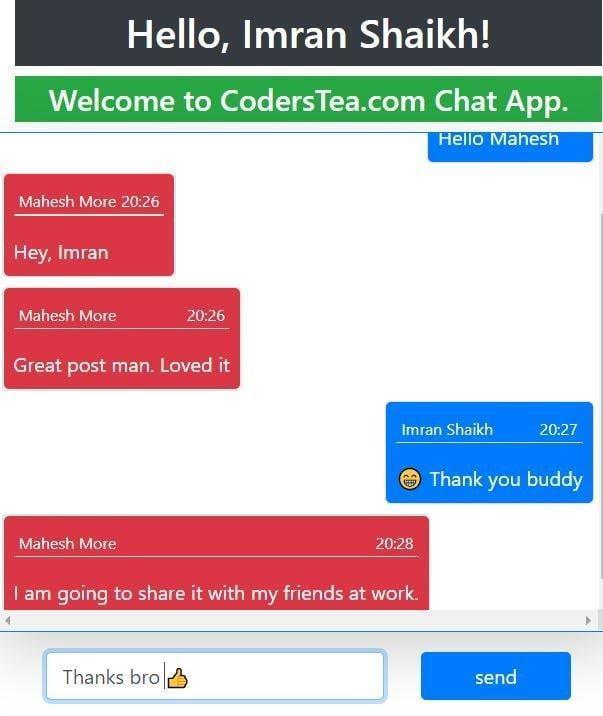
Imran’s chat
User2’s window.
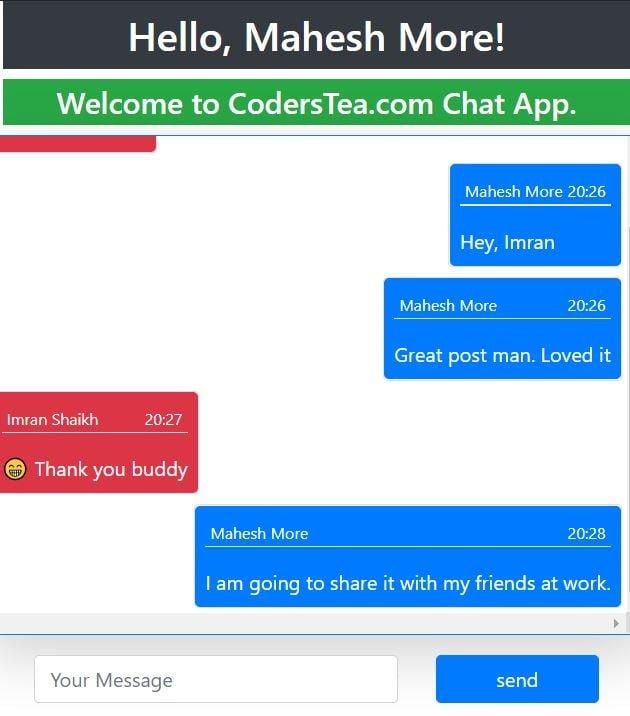
mahesh chat
Conclusion
As you can see, it is not that difficult to create a chat application, a simple one at least. Yes, it is not perfect and can be improved. But hey, we just wanted to get our hands on Spring WebSocket and see how it works. We will create our own WhatsApp, later.
In this, I just showed you a single link or endpoint and everybody is connected to the same endpoint. You can also create a personal chat application. It just needs some little modification. I will create an v2.0 of this with the personal chat. But for now, you can see all the code on GitHub, GitLab, and BitBucket. And let me know what I can improve in this post and some ideas for another post as well. See you in another post.
Hakuna Matata!!!